Tips for Patent Drawings That Save Cost And Time – Webinar
Key-points Covered in this Webinar (Tips For Patent Drawings That Save Cost And Time) Session:
- Why is a clear input more important than the specification?
- How to make a rough sketch according to the needs of the illustrator?
- What method should be followed when starting the iteration?
- What are the best input forms for obtaining accurate patent figures?
- How can an illustrator create complex figures from minimal input?
Key-note Speakers
Melvyn Thomas, Head – Online Sales, Sagacious IP
Clifford D. Hyra, Founding Partner, Patent and Trademark Attorney at Fresh IP PLC
Anchored By
Rahul Rana, Sr. Executive – Business Development, Sagacious IP
Submit Your Information to watch the Webinar Video:
"*" indicates required fields
More details about this Webinar:
The topic will help the targeted audience to find excessive method to save cost and time. This will expedite the acquisition of accurate figures. This will help to reduce communication gap between the inventor and attorney and the illustrator.
Table of Contents
Webinar Transcript:
Introduction
Rahul Rana – Greetings, ladies and gentlemen. This is Rahul Rana, senior executive business development at sagacious signing in from India to welcome all of you to our webinar today on the topic Three Proven Tips For Patent Drawings That Save Cost and Time.
So, before I go on to introduce this topic and the esteemed guest speakers on our sessions today, I’m delighted to welcome all the participants from different countries like the states, United Kingdom, Australia, Austria, Germany, Japan and Uruguay and any others. We have a good turnout today, so yeah.
So, your participation is a wonderful encouragement to the efforts and attempt that we are making to raise awareness and spread knowledge that has been owned by sagacious over several years of working with inventors, R&D organizations, IP departments, and IP law practices. We really appreciate your joining us and giving us the support for that.
Rahul Rana – So, our first speaker of this session is Melvyn Thomas. He is the head of the online sales channel at Sagacious and Melvyn has eight plus years of experience in managing the sales process and providing a high level of customer service and retention. So, welcome to the webinar tips for patent drawings that save cost and time Melvyn.

Melvyn Thomas – Thank you, Rahul. I am glad to be a part of this webinar tips for patent drawings that save cost and time and especially us speaking along with Cliff who comes with a vast legal experience in the IP space. So I’m sure the knowledge sharing that he does will definitely benefit us as well as our audience of this webinar which is tips for patent drawings that save cost and time . So thank you and welcome Cliff.
Cliff Hyra – Oh, thanks very much for having me. Looking forward to the webinar tips for patent drawings that save cost and time.
Rahul Rana – Yeah, so indeed Melvyn as you said yes we have a guest speaker today, Cliff. So, Cliff is from Reston Virginia. He is a Member Patent and Trademark attorney at Fresh IP PLC. Also an intellectual property attorney with broad experience handling domestic and international patent and trademark matters.
Cliff worked for the Global client base including multinationals, universities, overseas IP firms and SMEs all over the country and around the world. So, Cliff welcome from my side as well to the webinar tips for patent drawings that save cost and time.
Cliff Hyra – Thanks Rahul.
Rahul Rana – Yeah, so as I said it’s been a great pleasure to have you on our webinar tips for patent drawings that save cost and time. So before we start the presentation today for tips for patent drawings that save cost and time, let me ask our speakers for some initial remarks whatever their thoughts are on today’s webinar topic which is tips for patent drawings that save cost and time. So to begin with I’ll ask Cliff to give his initial remarks about the topic today which is tips for patent drawings that save cost and time. Please Cliff take it on.
Cliff Hyra – Sure, yeah I think patent illustrations are really important in patent applications but they’re also oftentimes overlooked. If you’re familiar with patents and you sometimes see in the granted patents drawings that are very crude, you know, sketches and things like that. So, it’s kind of funny almost but you know but it’s very important especially for design patents.
For design rights the drawings are the claim of the application right there. The legally operative portion that’s going to be looked at to determine whether someone’s infringing or not. So, they’re really critical. And of course, design copyright being the patents that protect the appearance of a useful article. But in a utility patent in the United States that’s the type of patent that protects the functionality of an invention.
But even there, right. So a lot of times the examiners will only look at the figures and the claims of your application because it’s more efficient for them. They don’t have time to read the entire application thoroughly in order to meet their production goals.
Cliff Hyra – So, the figures are really important in communicating what your invention is to the examiner because you know it may be the primary way that they understand what it is that they’re examining and if you don’t have the patent drawings right and you can get some rejections that are very difficult to overcome, which is something that will be you know, we’ll be talking about more later in the presentation.
But, you know, it can be very frustrating for a client for an inventor to have a patent application that’s being held up on the basis of problems with the patent drawings. You know that nobody likes to be in a position where they’re arguing or trying to fix the drawings but it’s something that can happen, if you’re not careful. So that’s one of the tips for patent drawings. So, you know, I think it’s a great topic and I’m really looking forward to discussing it.
Rahul Rana – Sure that’s great, Cliff. Thanks for your initial remarks. Now moving on to Melvyn please do share your initial remarks on this topic tips for patent drawings that save cost and time.
Melvyn Thomas – Thanks Rahul and thanks Cliff. You’ve kind of covered the context wonderfully and you know in my view it is the context of this webinar tips for patent drawings that save cost and time, is you know to get an essence of the main requirements to produce high quality patent drawings. Working with my clients what I realized is that it causes a lot of trouble and headache when we end up having too much back and forth round of revisions on patent drawings. You know, it’s a waste of time, energy and money.
So, it becomes important that the initial files or the sketches, or the photos, sketches, especially those are sent should be up to some standards for the draftsmen kind of get a good feel or visualization of the invention. And so that the first draft can be sent on a good quality standards.
Also based on that the draftsman can use their drawing skills to convert them into high quality patent drawings. Use the appropriate shading and the other technical skills that are required to produce those patent drawings. And then we’ll also touch about some 3-D models for the audience here, 3-D models, how important and how it helps to prepare the patent drawings and some other tips for patent drawings. So these are some things that we’ll be covering in this webinar tips for patent drawings that save cost and time. And yeah that’s about it. So, over to you Rahul.
Rahul Rana – Well thanks Melvyn and Cliff for setting the context of this webinar. And we’d like, you know, the whole structure of the webinar patent drawing tips that save cost and time.
What are we going to talk about? And, you know, we’re going to give some information about the whole patent drawing process and how it works and how things are going to be. So, before we move ahead and, you know, give out the presentation I would like to remind our listeners to keep sharing their questions as and when they have during the course of this session.
So, you know, we will be asking their questions to the speakers so that they can get a better understanding out of it, so, they can share their questions via the go to webinar question box on the right side of the presentation window.
Rahul Rana – I will pick up on those questions and ask them to our speakers after they finished their brief presentations and we can get more clarity for our listeners. So, in addition to that, I do have an announcement from our team. The sagacious team is offering, you know, an exclusive offer for preparing four figures of patent drawings at no cost for the audience of this webinar tips for patent drawings that save cost and time. It’s an exclusive offer for all the listeners that are joining us today on this webinar.
You guys can drop an e-mail over to us at [email protected] and, you know, we’ll share the information with them. And let us now get started with the main part of our presentation. And I’ll take this thing forward so for that. Let me invite Melvyn to present his slides and take us through this webinar. So Melvyn, over to you.
Various Tips For Patent Drawings
Shading In Patent Drawings
Melvyn Thomas – Yeah. Thanks Rahul. So, yeah. I’ll just go through the slide here that talks about what we will be covering in this webinar. So we’ve kind of identified three important tips that we would like to share in order to produce good patent drawings and the tips for patent drawings. And the first one of them is shading in patent drawings.
So shading is, you know, it’s one of the key aspect in helping us learn the features of the invention or the product the different surfaces and the kind of in-depth features. So we’ll be talking more about that in the next slides and then the rough sketch making methods.
At times, you know, being a draftsman or a drafting company we get rough sketches. So the better quality, the more better quality of rough sketches that we get the better it is to produce the formal drawings. So, that’s one thing that we’ve been talking about and the importance of 3-D models which is one of a very important thing and one of the thing that is required even after you move forward.
Melvyn Thomas – You know after patenting process when you move forward to the manufacturing process and then we also have a practitioner’s view on all of these points. By our guest speaker, Clifford Hyra, he’ll be sharing his legal experience and his expertise over and above everything.
That’s pretty much about it though the overall overview of this presentation. So, I’ll move on to the next slide now. It talks about shading in patent drawings. So, like I said before understanding an invention by defining the product shape. So based on the shading it becomes really easy for any examiner to understand the parts of the invention especially for a design patent.
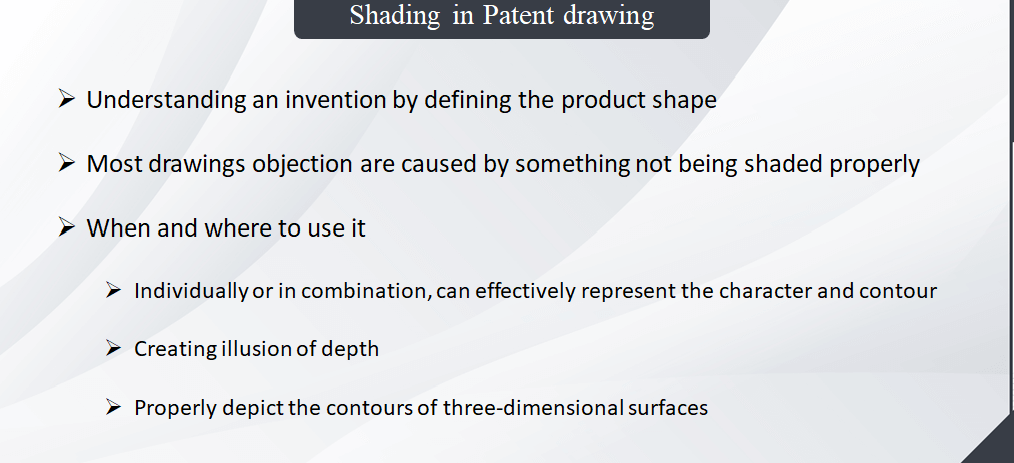
And shading is the main thing that helps them to depict what surface are they talking about what view is a particular drawing trying to explain about the invention. And we’ve seen that most drawings objection are caused by something not being shaded properly. So, you know, the kind of shading the kind of thickness of the lines or the gap between the lines for showing different surfaces.
Melvyn Thomas – So these are some things that a draftsman really takes care of while doing the shadings on the drawings and when and where to use it. I’ve seen sometimes we kinda overdo shading or sometimes it’s not done in an appropriate way to the extent that it should be done. So that’s also becomes really important. Then individually or in combination it can effectively represent the different characters and the contour. So how can do it together different sort of shading.
Like thick shading bold lines or thin lines and how is the combination used creating illusion of depth? This is something that every Draftsmen, has their own based on their thinking of how deep can they go into the mentioned and think over it and then use the shading as a tool. And then properly depict the contours of three-dimensional surfaces. So it’s really important to show details of three dimensional surfaces. That’s pretty much about this slide. So Cliff if I may ask you if you’d like to share your thoughts about this.
Cliff Hyra – Yeah I mean shading is very important and especially if it for design patents. And it’s something where a lot of times I’ll get people asking me especially coming in from Europe where there’s the standards for designs are a lot looser they’ll say well we have drawings. Can we use these drawings? And almost always the drawings don’t have shading.
And so I always discourage anybody if I’m trying to use their own drawings because it usually doesn’t. It usually doesn’t work out. You know in my experience even when they have computer generated drawings( CAD drawings) things like that. So we always have those drawings prepared formally by Sagacious and that’s the fundamental struggle is you’re trying to portray a three-dimensional object in a two-dimensional medium, right?
So shading is really critical for that and especially in design patents where it’s really essential that every aspect of the appearance is both consistent between views and very clear to the examiner.
Melvyn Thomas – Yeah, Rightly said.Great.
Types Of Shading
Linear Shading
Okay so I’ll move on to the next slide which talks about different types of shading. So linear shading the line sharing that’s also called line sharing that’s more preferred shading by inventors as well as the drafting people. I’ve seen this kind of shading is used in majority of the drawings.
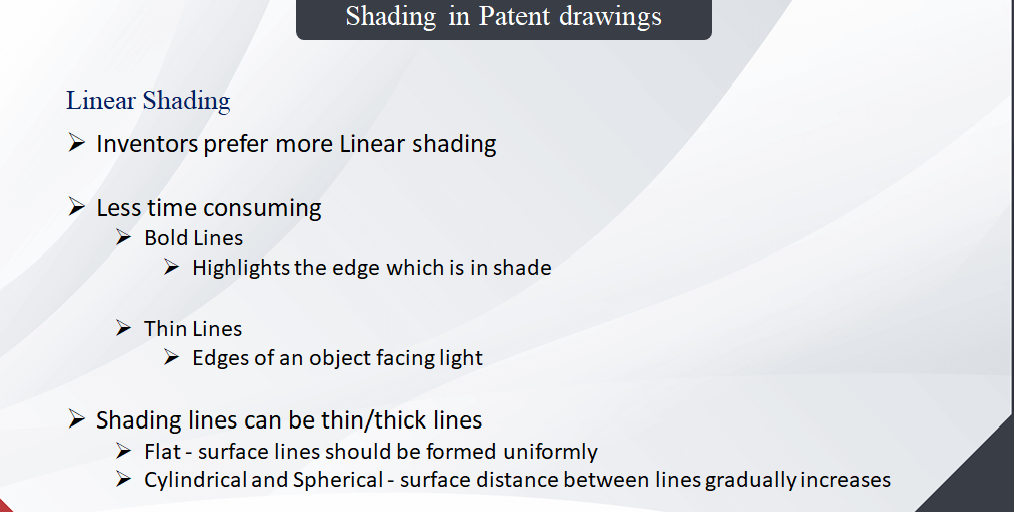
It’s just line sharing and it’s about bold lines and thin lines and bold lines are used where if some part of the of the invention or object isn’t shaded, it’s not under under the light. So mainly that are bold lines are used for shading and thin lines will be used where the object is facing sunlight. So , you know, the draftsmen they use their mind on how well they have to use the borderlines or where they’ll be using thin lines.
Melvyn Thomas – And shading lines can be thin or thick lines. It kind of also depends on the surface like if they want to show a flat surface then the gap between the shading lines should be uniform. So that if the gap between the shading lines is uniform then it depicts a flat surface. And on the other hand if it’s a cylindrical or a spherical surface so the distance between the linear lines, I mean the linear shading lines it kinds of gradually increases or decreases.
So these are some tactics, skills that are used by the draftsmen while doing the shading, the linear shading. Yeah, so like I said light source is one thing that we keep in mind. So it is as it always assumed that the light source has to be from the upper left-hand corner of a view.
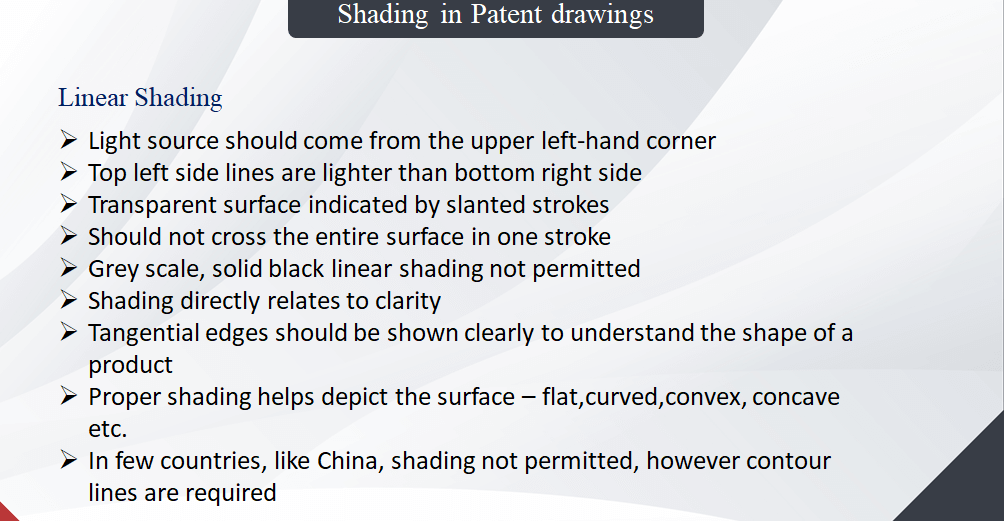
So, it means that the upper, the top left would be exposed towards the light and the bottom right side would be on a darker side. So, since that’s the way the shading the bold lines and the thin lines are used towards the left side which is exposed to light and the dark side would be the shading would be done through bold lines and for transparent surfaces they are usually indicated by slanted strokes like 45 degrees slanted lines and those strokes also do not cover the entire surface of the transparent body.
Melvyn Thomas – It’s they’re just done in one particular area not covering the entire surface because otherwise it will be hard to differentiate between a transparent surface and a non transparent surface. It’s usually grayscale and solid.
Black linear shading is not permitted in design drawings and like we’ve been discussing sharing directly relates to the clarity. Tangential edges should be shown clearly to understand the shape. So, tangential edge is the transition line between two tangent surfaces, so, it’s very important to show that clearly through sharing otherwise those two tangent surface would look like altogether one individual surface.
So, that tangential edges needs to be well taken care of through the appropriate shading and proper shading helps to pick the surface flat, curved, convex ,concave different styles of shading would be done to show these different kind of surfaces.
Melvyn Thomas – Few countries like China shading is not permitted, however, contour lines are required.
Before moving on further I would like to ask Cliff. So what sort of expectations do you have while you outsource your drawings were to a company like what do you expect them to take care of you know do’s and don’ts? So if you can share some of, you know, throw some light on this.
Cliff Hyra – Yeah. I mean definitely shading is something that I rely on a draftsman for. I think that, you know, everything that you’re discussing with regard to shading is it really illustrates the fact that it’s very very difficult even for me, obviously, I’m very familiar with patent drawings but for a client certainly or an inventor to do something like this is quite difficult. So I really rely on the draftsman to get the shading right.
And in my experience they’re very good at that especially sagacious and sort of in general what do I expect? I mean any draftsman is typically they’re very good at getting the basics right in terms of lightweight shading size things that are difficult to do when you’re sketching or informally but they are going to attract objections a lot of times if you don’t get them right.
So, I expect of course those basics always to be correct and generally that meets my expectations. But the key I think that differentiates really good draftsman from not as good draftsman and where sagacious shines is fast turnaround and accurate turnaround. Where you’re not just meeting a deadline but you’re also giving me something that’s thought that I can file or that’s close to being fillable and then I think something that you discussed earlier the whole revision process.
Cliff Hyra – That’s really the key is being able to understand the revisions that need to be made when I explain them in getting the revisions, right the first time so that we’re not going back and forth on the revisions. That’s something where the attachment was not as good kids struggle.
And it’s a frustration for me because clients don’t like to pay me to talk to the draftsman and fix that get the drawings right. You know, so it’s not exactly a profitable activity for me . So that’s really the key to a good draftsmen is doing a good job the first time around and then being able to understand and execute those revisions that are requested. Quickly and accurately, I think that’s the key thing that I look for.
Melvyn Thomas – Thank you. Thank you for the accounted answer, Cliff. That’s right. Let’s move on to the next slide.
Stipple Shading
Stipple shading. It’s another form of shading we just spoke about the linear shading. So stipples are those dotted shading. You can see the examples here as well you know these are expensive and time consuming. And you need highly experienced and expert illustrators to perform this as it’s being done manually and takes a good amount of effort. And these are useful for showing a rough textures or flexible surfaces where there’s a flexibility in the surface like this cheese over here.
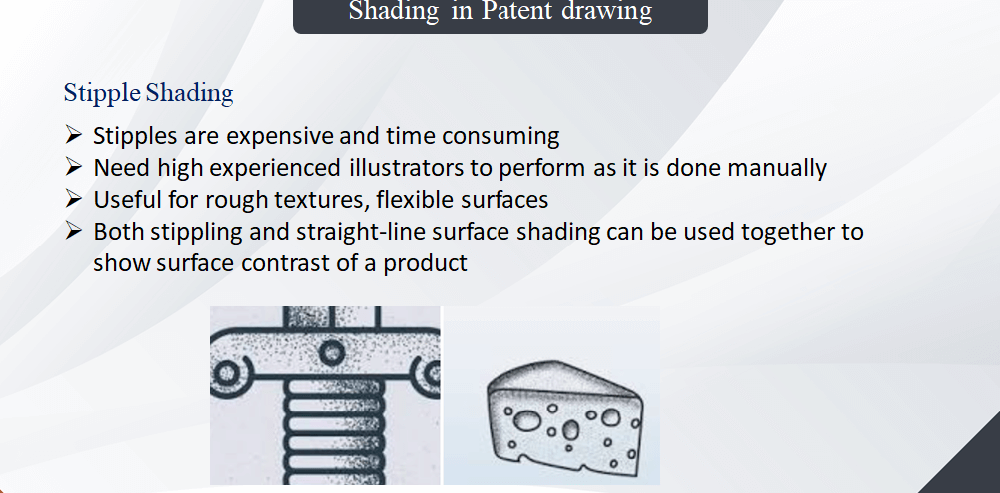
And clothes or fabrics and both stippling and line shading can be used together to show surface contrasts for product. So that’s some information about stippling shading.
Rough Sketch Making Methods
Melvyn Thomas – So like Cliff just said that it is a very important factor when it comes to reducing the back and forth revisions. And this starts right from the first level, I mean which is there are the input files that a draftsman received. So talking about that. We’re coming on this part of the webinar which talks about the rough sketch making methods and how can we improve on that.
So that the initial files that are sent to a draftsman those are in a good format or a good quality stage you can say. So yeah, it is said that the sketches should simply execute keeping the essential features of the invention in mind. You know this should not be overdone neither under done and making sure that all the features are capitalized they should be simply drawn. Elevation sketch are always preferred because they kind of portray each side of the inventions especially if we’re talking about a design patent.
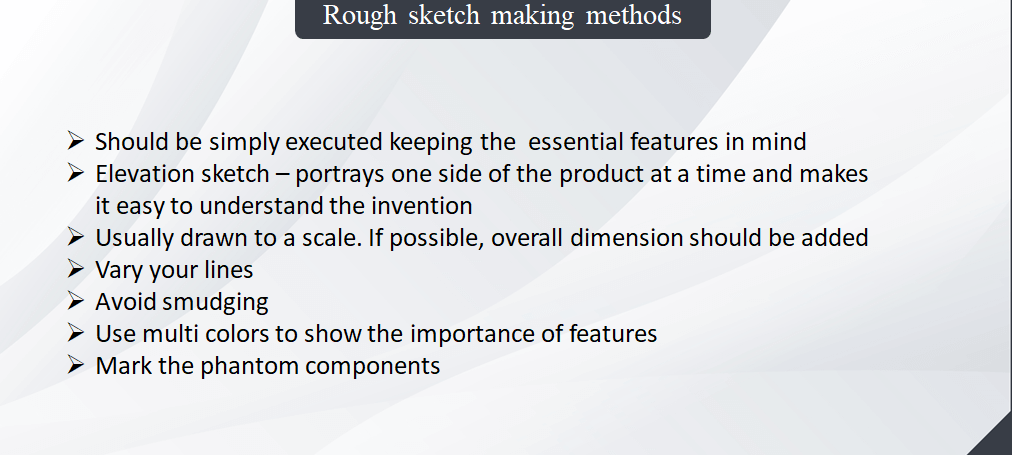
And you know for that you need to have a clear view of different views of the invention like front, back, left side, right side ,top side, bottom side and a couple of perspective or an eagle eye view you can say. And they should be usually you know drawn as per the scale the proportion should be as per what the product really is although the dimensions are not required to be filed as per the patent office guidelines you don’t need dimensions there. But the scaling should be appropriate.
Melvyn Thomas – The lines should be varied as per the product as per the features of the product. Smudging should be avoided it makes it really difficult when the quality of the sketches or pictures is not so good. So, I know, it kind of doesn’t help to understand the invention when it comes from when we are talking from a draftsman perspective and using multi colors to show the importance of features and marking the phantom components. So at times you know we do not mark the phantom components.
The draftsmen ends up making the complete drawing and then, you know, it’s been said that this part is not claimed and then we have to again go and do the rework. So, it’s always better to give the information proactively the right information to the draftsmen so that the right, the expected thing can be produced.
So, these are some of free sketch softwares that you can see on your screen right now. These are good software you can use to prepare your sketches Sketchbook, Sketch up, Artweaver, Microsoft , Fresh paint, Krita.
Melvyn Thomas – Pencil sketch tips. So, yeah try a different mark making methods this is one thing that is recommended while drawing the sketches. Draw crude sketches through a pencil. Use a blending stick or smooth shading. Shading needs to be done appropriately so blending stick or right sort of pencil at the right kind of angle to do the shading.
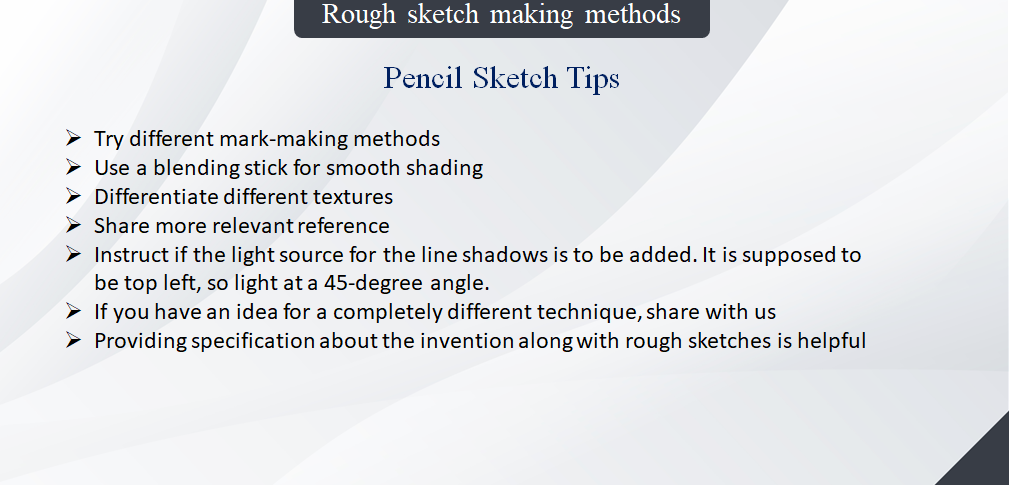
And it is always advised to differentiate the textures of the different textures of the invention and share only the relevant reference images or I mean the sketches. Because at times we get a lot of sketches and then we sometimes, we get requests to pick some component from one sketch and the other component from the another sketch and club them together and then prepare another third drawing.
So, it is always advisable to sketch it up in the way you want it. So the better sketch is being provided not a sketch that can be just converted to a formal drawing. The better it is to come up with those formal drawings.
Melvyn Thomas – And like we’ve discussed before. So the light source. Yeah, if that is being instructed so it helps to do right appropriate shading.
And if you have any idea if you have for the audience you can certainly share with us regarding, you know, the pencil sketch tips and providing specification about the invention along with the rough sketches and tips for patent drawings that helps. At times we’re not able to draw what’s there in our mind. If you can provide if we get the specification part of the invention maybe not the exact specification in a patent office language but even if it’s a textual description. That also helps.
So, yeah Cliff would you like to add something here?
Cliff Hyra – Yeah, I mean sketches are very important because what draftsmen really excel at is, if you give them a sketch and you say turn this into a formal drawing and they do a lot of times a great job certainly sagacious does of making sure that it complies with all the formal requirements of the USPTO or whatever Patent Office you’re working with. But anybody’s gonna struggle.
If you give them a description, text and you tell them I’ll make a drawing from this if you give them a sketch and you say but really this sketch should be different in these ways and expect them to synthesize that and sort of generate a drawing themselves. You know that for anybody that’s just a very difficult thing to do. So what your expectation should be that you’re going to do a sketch and they’re going to make it look really good.
But it’s gonna look a lot like your sketch. So you’re gonna get back something that’s a lot like what you send substantively. So it’s very important. You know, the key thing when you’re making sketches and I make a lot of sketches myself because sometimes I have a better sense of what needs to go in the sketch then maybe the inventor guys. And that’s the key focus has to be what are the key features?
Cliff Hyra – And how clearly can I show these in the sketches? You know, that all the formal stuff draftsman is going to take care of. But in terms of getting that key feature down that’s the most important thing and making sure it’s understandable the way it’s presented. And sometimes, many times that can be done with paper and pencil depending on what the invention is you know sometimes you need computer aided design tools. But fortunately these days there’s lots of great free tools. You know, as Melvyn mentioned.
Melvyn Thomas – Right, great, Okay, thank you. So this slide talks about our website which is https://thepatentdrawingscompany.com/ so you can come on this website you can upload your initial files, sketches and place your order based on the number of drawings so it’s a very easy to use website and you can just go ahead and place your order.
I would like to now yeah Rahul I’ll just give it to you so you can further hand it over to Cliff from here.
Rahul Rana – Thanks a lot. Thanks a lot Melvyn for the whole introduction about the whole surface shading and whatever the importance of shading is in patent drawings and what things that people need to keep in mind when presenting rough sketches and how they can prepare rough sketches for submitting to any drafting team that would be formalizing their patent drawings.
So, well considering all these information I guess it’s been a very informative presentation for how to proceed with the drawings like how you can submit the rough sketches and what are the important, the importance of different aspects of the drawings that you’re going to send it over to draftsmen who is going to in turn give you the formula drawings that you can follow in the patent request.
So, it was really great to have your presentation and comments from Cliff as well on that. And, you know, without any further ado I would like to hand over the mic to Cliff and you so that he can take us through his part of the presentation.
Rahul Rana – And once again, I would like to request all the listeners in the audience to submit their queries on our on the Go to webinar queries section. You know so that you know if you have any queries or you have any confusions or you want some further information about anything. Please do let us know so that we can make it much more useful for you and know your understanding so that you get the most information that you want out of it.
So, from here onwards Cliff. I would like you to take over and take us through your presentation.
Cliff Hyra – Okay sure you want to go ahead and switch over to the next slide here.
Rahul Rana – Yeah, please.
3-D Models And It’s Benefits
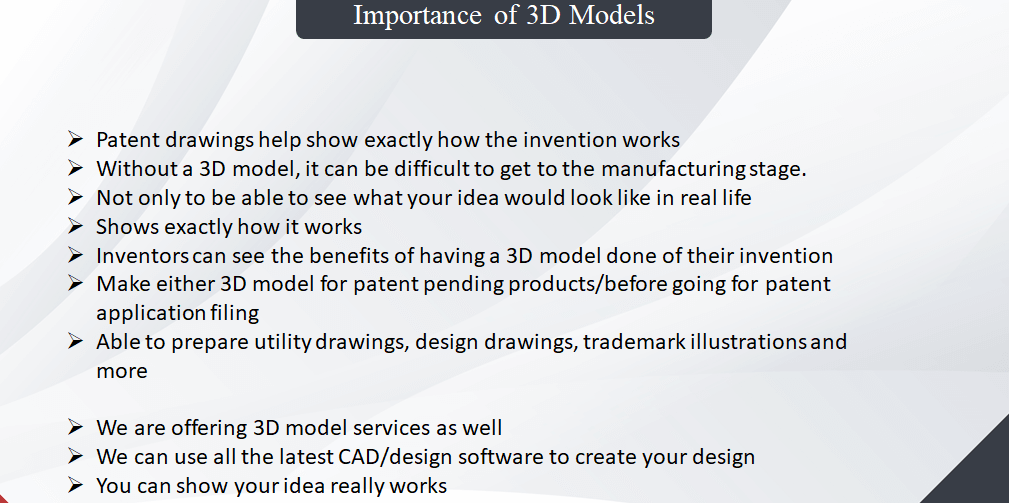
Cliff Hyra – So, yeah, I think that 3-D models are really nice thing to have especially if you are interested in protecting the appearance you know with a design patent one of the key aspects of the drawings for design patent is that all of the views need to be consistent with one another. It’s one of the tips for patent drawings.
And the examiners are very careful about that and they’ll notice very minute differences between the views that are not necessarily immediately apparent. And so that’s one thing that a 3-D model does for you is that it ensures consistency between all of the views that you use in your application. Because you know to generate those views you can just take the 3-D model and you can rotate it to whatever view if you want to do the various sides.
And even if you want to take sections and things like that ,you know, that every drawing is going to be internally consistent.
Cliff Hyra – But you know, it also has benefits, right? It’s very useful.
Also if you are looking at manufacturing you’re making a tool or something like that a dye. For Manufacturing. That’s something that’s really helpful. And of course also for marketing generating marketing materials and demonstrating the function of your invention. It can be really useful. And so it really serves a plethora of purposes. You pay for the model once and then you can use it again and again for all these different applications.
You know that you can use it for your utility drawings in addition to your design patent application potentially if you’re doing trademark, trade dress protection or something like that you can use it again. So you know a lot of times it’s a good investment, you know, if you’re anticipating that you’ll be able to use it a lot of different ways. Melvyn I don’t know if you have anything you wanted to add to that.
Melvyn Thomas – Yeah. Thanks, Cliff. You view rightly, you’ve kind of covered everything here so it becomes really easy for a draftsman to extract the required views from a 3-D model, you know, when it comes to drawings preparation. And the views that are extracted are there, they’re kind of really accurate.
Even if you compare them with a photograph or a sketch you know. So, it really helps there. And yeah there, I mean, for the further work on manufacturing and marketing this 3-D model certainly can help the mentors or, you know, the companies so yeah.
Cliff Hyra – Okay let’s go on to the next slide then.
Common Issues With Patent Drawings/Practitioner’s View
And yes and I’m going to talk a little bit about just for me as a patent attorney, you know, what kind of issues do I encounter and you know what steps can you take with the copyright drawings to avoid those kinds of issues? I think ultimately that’s really where you can save the most time and money is in avoiding these really problematic situations that can occur down the line during examination know if that patent drawings aren’t right.

At the time that you submit them so , for me, what keeps me awake at night you know, what are my nightmares about? Well when I was in school I had the nightmares about I didn’t know I was involved in the class and now it’s the final exam. And I don’t know anything about it. Now that I’m a lawyer my nightmares are all about things that I can’t errors that I can’t fix in my client’s applications.
Cliff Hyra – Miss deadlines, right? So that’s my main my number one concern. I mean if the patent drawings are objected to because you know the lead line is wrong. The line weight is wrong or the lead line goes the wrong place or the numbers right or something like that.
You know, I’m not crazy about it but it is not the end of the world but there are some issues with drawings that are very difficult to correct or might even not be correctable and so the issues that are typically not correctable or different very difficult to correct will be those that would require the introduction of new subject matter to fix. For example in a design patent application if it’s not clear you know what some aspect of the design is.
Whether it goes, you know, into or out of the page or something like that. If you file a new drawing it clarifies that it may be rejected by the examiner because he’d say well you’re introducing new subject matter and you’re not allowed to do that.
Cliff Hyra – Once you file your application that’s it. What’s in that application is all that you can use. And you can’t make any changes to what was filed. You can sort of shift things around within the application. You can draw from one part and put it in another but you can’t put new stuff in unless you file what’s called a continuation in part in the United States.
So you actually have a little bit more flexibility in the United States but even so what happens with the CIP continuation apart is you’re typically going to lose your original filing date which in certain circumstances can be a very big problem, you know, may make it very difficult to achieve patent protection. So we’ll talk about that in a little bit more detail if we move on to the next slide here.
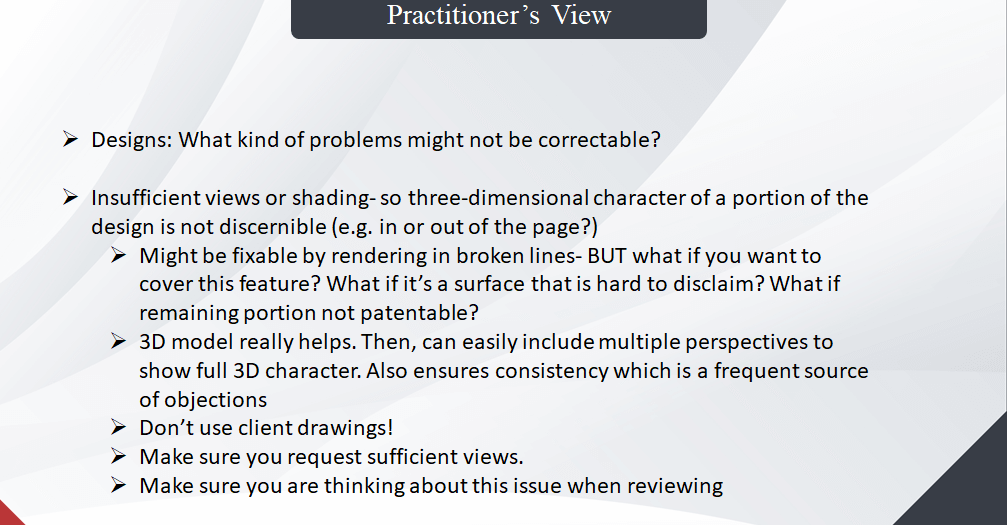
So, first thinking about designs where patent drawings are really the most critical. You know, what sort of problems might we have that wouldn’t be correctable without the addition of new subject matter? So one is possibly not having sufficient views to be able to understand every aspect of the design or insufficient shading so that you can’t tell what the 3-dimensional character of a portion of the drawing is. You know, as we mentioned earlier right?
Cliff Hyra – The fundamental challenge with the patent drawings is trying to convey a three-dimensional image in a two-dimensional medium. So the shading as we talked about is critical to that and kind of the classic problem is being unable to determine whether something’s coming out of the page or going into the page. And that’s where drawing conventions relating to shading can be really critical.
So sometimes with design patents, you know, you can fix things by rendering them in broken lines basically saying we’ll just take this part out of the invention completely. I can’t fix it but I can just take it out and just proceed for a patent on the remaining stuff. But some maybe that feature is really important and you want coverage for it or maybe it’s a whole surface of the invention and it’s something that you really can’t take it out or maybe without that feature design as a whole is not patentable.
So that’s the kind of thing where sometimes you can make a last-ditch effort to say that but it can be really a big problem. I think we just discussed ,you know, we just discussed 3-D models and that’s one thing. This is that’s with design patents that’s one thing where the 3-D model really helps is ensuring that you have consistency. As I mentioned that’s a very common source of objections from the examiner is that you know something slightly different in one view than in another.
Cliff Hyra – So and I guess now I’m kind of you know circling back but it’s good because we’re emphasizing these important things, don’t use especially right for designs don’t ever use a drawing that comes from the client. That is one of the tips for patent drawings. And if you are an inventor or an applicant don’t use your own drawings. Don’t let your attorney tell you that your drawings are good enough because they’re really not. It’s almost inevitable that you’re going to have problems big or small but even if there’s a small chance of having a big problem like this, it’s worth the money to avoid.
So you always want to be thinking about this issue when you’re reviewing the patent drawings prior to filing and using a fine tooth comb to make sure that every element of the design is it’s clear. You know what the three-dimensional character of it is and making sure that you are requesting, typically the draftsman is going to give you whatever views you ask for. So make sure you’re asking for enough views that all of this subject matters really clear and a lot of times that means multiple perspective views.
So kind of the classic site views like the six side views and a perspective for the design. But a lot of times I’ll ask for at least two perspectives because perspective you can only show, it can only show at most three sides out of the six. So be generous and ask for more views because it’s better to have more , it’s better to have too many than not enough.
Melvyn Thomas – Right, right, Right.
Cliff Hyra – So do you have any comments Melvyn before we move on?
Melvyn Thomas – Yes, that’s right. So, I mean till the time we can file more than seven or the standard views and the examiner doesn’t have any problem with the number of views then it’s better to add more views maybe a couple of more perspective views in the application.
Cliff Hyra – Okay, great and so moving on to the next slide then I believe I have utility applications next.
Tips For Patent Drawings In Utility Applications
Yeah, so with utility applications the claims are not the drawing. So, they’re in some ways they’re not as critical but as I mentioned the examiners really rely on them quite a lot for understanding the invention. And sometimes they don’t even read they don’t even read your description in at least initially, they’re just looking at the figures and you can also have these kind of problems in the utility applications where suddenly you have something that’s not fixable on the drawings where it’s going to prevent you from getting your patent.
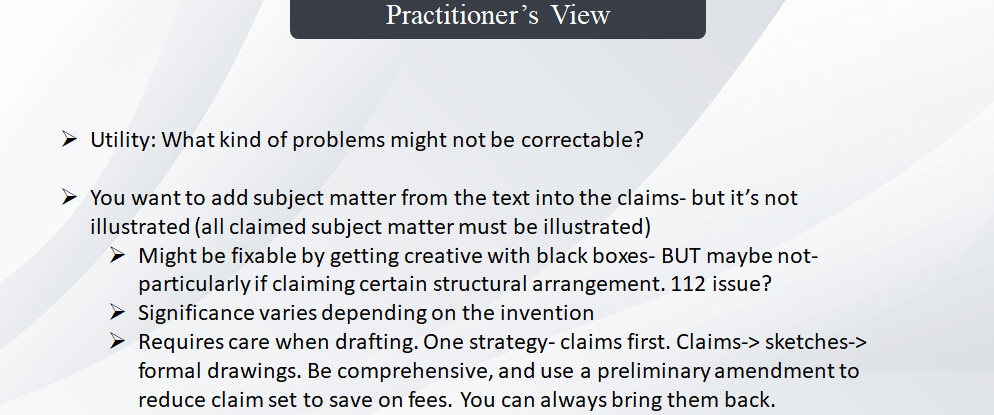
So the key kind of the classic situation is where your claims have been refused. They’ve been rejected on the basis of some prior art. You go through your description and you find some subject matter that distinguishes your invention from the prior chart. So you want to take it from the description and move it into the claims which you are allowed to do as long as it’s in the application somewhere.
But, you know, you can get hung up because one of the requirements is that all of the subject matter in your claims have to be illustrated in the drawings. Of course everything I’m saying pertains specifically to the US Patent Office but you know, many patent offices worldwide have similar requirements. But so that’s a classic thing is that you amend the claim. And then the examiner says well, you don’t have this illustrated in the patent drawing.
Cliff Hyra – And you have to either illustrate it in the drawing or take it out of the claim. But when you if you are going to add a drawing you had to make sure that you don’t introduce any new subject matter. And that’s very difficult to do. If you don’t have a drawing of it at all. And you need to make a drawing. Well, pretty much any drawing that you’re gonna make is going to add new subject matter because a picture is worth a thousand words.
So, unless you originally had at least a thousand words describing the appearance and even then that’s probably not enough. There’s probably some aspect of the drawing the shape of the object that’s not going to be considered to have already been in the text. So this might be fixable by getting creative. Typically, what I would do if I went into switches situation like this if it’s a case I’d taken over from somebody else or something is I tried to do black boxes. Right.
So if you just put up a box on the on the figure and you say yeah this is, you know, this is the radar array or something and I’m just I’m illustrating it. Schematically so that way you’re not putting any specific structure in there that’s going to result in a new matter objection. These are just some of the tips for patent drawings.
Cliff Hyra – So, a lot of times that’s a way to fix it. But you can’t always depend on that, you know, some examiners may have a problem with it and in some situations it might not be possible. If you’re especially if you’re trying to claim something about the structure then you’d be required to illustrate that. And that’s where you’re going to run into a problem. 112 is that I referenced on the slide. That’s a reference to the Code section that addresses the lack of written description of support for new subject matter.
So, the significance is kind of it varies depending on what your invention is. Some inventions if there like a single object that you can make a 3-D model of and include a lot of angles views up. You don’t have to worry about this as much.
Because you can be fairly confident that you’ve captured all that subject matter. But with other things, you have to be really careful. And so one thing that I do by practice is I really emphasize the claims first. You know, so when you generate the claims and be really generous with the claims and sort of think about everything that you might at some point want to claim and then you know once you’ve generated that list.
Cliff Hyra – You can kind of pair it down. Because there are fees right for exceeding a certain number of claims but based on that list use that to generate the patent drawings. Because right you have to have a drawing for all claims subject matter. So you want to make sure that you have a drawing of everything that you might want to claim. So it’s something that you really need to think about initially when you’re drafting the application.
You can’t afford to leave it until later on because of course you can’t add new subject matter after you file. So, you know, as I mentioned here when you can have a long list of claims use a preliminary amendment to cut a bunch of them out so you don’t have to pay the fees for them.
And once they’re in the application, even if you cancelled them you can always bring them back later on if you need to. So that’s one way that I tried to avoid this kind of situation that can be really frustrating and difficult to fix and is one of the important tips for patent drawings. And as I say gives me nightmares. I don’t know Melvyn, if you have any feedback on that at all.
Melvyn Thomas – Yup. No feedback as such. Cliff you very clearly kind of explained the audience and us, you know, what are the problems could be related to utility applications when it comes to drawings? And the strategy that you’ve suggested claims first and then moving on with the drawing so that that kind of really makes sense, thank you.
Cliff Hyra – Okay, well I think that’s it.
Q&A And Conclusion
Rahul Rana – So, once again, thanks a lot Cliff for the elaborative explanation and coverage about the importance of 3-D files for preparing the drawings as, you know, explain how important these things are for clients as well as for the pursuit of their plan and manufacturing sections.
So, in addition to that we really appreciate the coverage of the practitioners view that explains a lot about what challenges practitioners face as well while they are dealing with the patent application and how they also need the figures to be very formalized. And it so that as you said give them least of the matter or least of the worries.
So, you know, I’m really thankful to both of you for covering so much ground on that and we do have a few questions from the audience as well and you know, we all so, you know, running out of time for the session. So we’re gonna rush through the questions. Just real quick. So the first question that I have is for Cliff.
Rahul Rana – So, Cliff, the question is that What are the key things you check before finalizing or submitting the drawings for your clients patent applications?
Cliff Hyra – Yeah I mean so definitely the things that you know I was referencing or the other thing that I am really careful with checking and making sure that all the claims subject matter is illustrated and that we’re claiming everything that we might want when it comes at least especially for utility applications for designs I’m checking that. You know all details of the design are clearly shown that I can tell the depth into or out of the page for every feature that there’s consistency between the drawings.
Those are the things that I’m really careful with and one of the crucial tips for patent drawings and then, I also try to clean up. Make sure that there’s none of these sort of smaller problems that are no common easily overlooked that you know all the elements have reference numerals that all those numbers are correct and match up with the text.
You know, all the lead lines are going to the correct place that’s a thing where like, if you have a pencil sketch a lot of times, if you have components that are close to each other, it can be a little ambiguous as to which one that the line is pointing to and that’s something that you want to make sure is right.
Cliff Hyra – Because otherwise there could be substantial confusion on the part of the examiner as to you know which part is which, which is something you don’t want.
Rahul Rana – That’s something that you want to avoid. Of course. So, yeah, that gives a much more depth about what kind of nightmares do practitioners face when they have to make sure that goes really well. So, yes that takes care of that.
And the next question that I have is for Melvyn. And the question is that what if I’m unable to provide good quality sketches? What else can I provide for you to prepare the drawings?
Melvyn Thomas – Yeah, we can work on sketches, rough hand-made sketches. I mean that’s the basic thing. You know, if you don’t have anything you can certainly come up with you know some hand-made sketches. But yeah apart from that, you know, if there are any pictures, photos or drawings in any other format, figures in any other format that can also work.
But sketches is the, you know, basic primary thing that we look forward to you know along with a specification or a textual description of the features of the invention that also helps. That’s the answer.
Rahul Rana – Basically the way ,the basic requirement and that helps us to formalize that drawings better that if sketches out there with some textual descriptions and apart from that of course if anything else they can provide like an image,3-D files whenever they can add on with the files they have already shared, right?
Melvyn Thomas – Right
Rahul Rana – Okay, perfect. So, moving on to the next query that we have. It’s again for Cliff and Cliff the question is that on what basis does an examiner usually object to the drawings?
Cliff Hyra – Well with design illustrations the type of objections that are most common for me are lack of consistency between the views as I mentioned previously and or a lack of clarity.
You know in some aspect of the design something that the examiner feels is not clear enough especially if you’re taking over for an international design application or something where you have to audit the drawings before they’re filed. But those are the two most common issues for design right applications that I run into that I had to address and try to correct. With utility drawings if there are formal drawings that were prepared by draftsmen I really don’t run into very many objections at all.
You know, you might have missed a number or a lead line or something like that or maybe there’s a number that doesn’t match up with the text it’s kind of small. Almost a typo but if you’re not filing formal drawings then you get all kinds of objections. The line weight is uneven, there’s some blurriness, it’s not reproducible at the right scale. The text is too small. You know, there’s all kinds of little formal issues that can trip you up if you’re trying to file an informal drawing.
Cliff Hyra – But you know, if you’re filing formal drawings for utility patent applications you don’t run into too many objections. That is one of the tips for patent drawings.
Rahul Rana – All right Cliff.
So, moving on to the next question is to Melvyn that the question is can I do some minor edits myself on the points that you prepare and send to me?
Melvyn Thomas – Well, yes, that can be done. We can provide editable format as well like a visio file that’s what most of our clients request for. So, at times they have to do some minor tweaking or revisions so they can you know do it through a visual file. So we can do that and we can also share the Illustrator file. Or some other editable formats that through which that can be done.
And I mean we also kind of provide a coverage but I’m talking about our clients who are based out of US, Europe. We have a coverage of the draftsman and the account manager till 3:00 PM ESD.
So in case they want to get some things changed or modified right on that day so that is also possible because we’ve got the drafting team who can, who does work, who is available not all the members but some people are available till 3:00 PM ESD just to handle those kinds of requests where that they need some quick tweaking and changes and they want to file the application the same day.
Rahul Rana -Okay perfect. So, next question is again for your Melvyn that how much do you charge for preparing the patent drawings and what’s the turnaround time?
Melvyn Thomas – Well that can be seen on our website. You’ll have all the information there. I’ve just went on to do the same slide thepatentdrawingscompany.com and the usual turnaround time is 3 to 5 business days and for any revision. I mean after we send the first draft ending iteration or revision can be sent in 24 business hours like one day. So that’s the turnaround time for any iteration request.
And then we also have expedited turnaround in case that is required at an earlier slide additional charge. So that can be seen through our website itself.
Rahul Rana – All right perfect so just to give you a better idea guys the patent drawings company is a standalone department of Sagacious that take cares and caters to the patent drawing requirements specifically. So you know you can just go to the website and patentdrawingscompany.com and get all the information about the services and the pricing and turnaround time. Every information about the patent drawings department of our firm at the patentdrawingscompany.com.
So please feel free to visit it. And if in case you have any queries you can let us know about that as well. So moving onto the next question because we actually have very less time left. So Cliff, the question is for you that do you help inventors with identifying which figures are drawings will be required to be filed in the application based on the invention description or disclosure?
Cliff Hyra – Yeah, absolutely. That’s an important part of the application preparation process. And, you know, as I touched on it earlier typically after attracted some claims then we go through the drawings and it’s great to get some drawings upfront from the inventor to help understand the invention and so forth. But typically it’s not going to cover the full scope of everything that they might be interested in protecting.
So, that’s something that I tend to look at pretty carefully make sure that we have drives for everything that we need. And if not I either ask the inventor for first sketches or like I mentioned I made to try to prepare some sketches on my own and check them with the inventor. Because, you know, it may be a bit easier for me knowing the patent office requirements a little bit better and so on.
So, it’s certainly something that I deal with every day and it’s an important part of the process when you’re preparing an application to file for a patent.
Rahul Rana – Alright, Alright. So, we are pressing on the time right now people so we have missed some queries that we got from the audience. And I’m sorry that we were not able to cover everything right now so we will get back to you with your queries with the responses you can just send us an e-mail and we can get back to you on that as well. So it was a wonderful session on tips for patent drawings that save cost and time.
I would like to thank Clifford for being our guest speaker and Melvyn as well for covering the important aspects about patent drawings and the requirements and the importance of formula is drawing for filing while you’re going for your patent applications.
So in addition to that as I already mentioned I would like to repeat the exclusive offer for all the participants of the webinar that you know we would prepare free four patent drawing figures at no cost. It’s exclusively for the participants of the webinar so whoever might be interested you can send us an e-mail at [email protected] and we’ll get back to you at the earliest. And once again thanks a lot for all the listeners, the audience and Melvyn and our guest speaker Clifford.
Rahul Rana – I really appreciate your presence today. So thanks for full time, though.
Melvyn Thomas and Cliff Hyra – Thank you.
Rahul Rana – All right. So, thanks a lot of everyone and please join us on our next webinar. We’ll be sending you an e-mail about that as well. So, I wish you all a great day ahead and take care of yourselves. Thank you, bye.
Submit Your Information to watch the Webinar Video:
"*" indicates required fields